

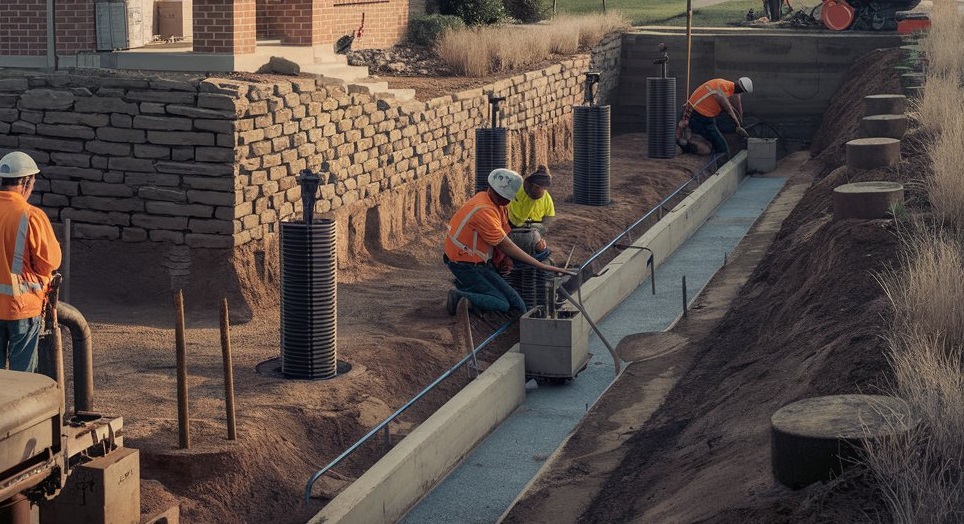
When you decide to renovate or remodel a bathroom, choosing the right contractor is one of the most critical decisions you’ll make. A proficient contractor ensures the project is on time, on budget, technically sound (plumbing, waterproofing, tiling, fixtures), and fuss‑free for you. On the other hand, a poor contractor can lead to delays, cost overruns, defects, leaks, or even structural damage.
A well‑executed bathroom remodel not only improves your comfort and aesthetics but also adds real value to your home. And because bathrooms involve plumbing, waterproofing, electrical, tiling, and complex trimming work, you want a specialist who has proven experience in bathroom projects.
In this guide, I’ll walk you through the best way to find and hire a bathroom remodeling contractor, share product tools that professionals and homeowners use, show real examples, explain benefits, use cases, and where/how to buy or secure such products or services, and address common FAQs.
Key steps in finding a bathroom remodeling contractor
Understand your project scope and budget first
Before you begin contractor outreach, define clearly what you want: full gut‑out, partial refresh, fixture swap, layout change, or adding luxury items (e.g., steam shower, heated floors). Also, set a realistic budget range. Having a clear project brief allows you to filter contractors who specialize in your scale and type of work.
Also, gather reference photos, measurements, and material preferences (tiles, fixtures, and hardware quality). That way, when you contact contractors, they can give you more accurate quotes rather than ballpark guesses.
Research locally and vet credentials
Start by searching for “bathroom remodeling contractor near me” or “bathroom remodel contractor [your city]”. Local contractors are preferable because they are familiar with local building codes, suppliers, and have a reputation in your area.
Check these credentials and vetting steps:
-
Licensing & insurance: Ensure they have the proper contractor license (if required in your jurisdiction) and liability/workers’ compensation insurance.
-
Portfolio: Ask for before/after photos of past bathroom remodels.
-
References: Request at least 2–3 references and call them to ask about timeliness, quality, communication, cleanup, and whether there were any surprises.
-
Online reviews & ratings: Check Google, Yelp, Houzz, or local directories.
-
Specialization: Confirm they have experience specifically in bathrooms (not just general remodeling) because waterproofing, drainage, plumbing, tile work, etc., are crucial.
-
Warranty/contract clarity: A good contractor will provide a detailed contract, schedule, payment terms, and warranty.
Request detailed bids and compare.
Invite at least 3 contractors to bid. Provide them with your project brief and ask for line‑item quotes that break down labor, materials, permit costs, disposal, plumbing, tile work, etc. Avoid “one lump sum” vague quotes.
When comparing bids, weigh not just cost but also: reputation, timelines, materials proposed, warranties, and the professionalism of the estimate.
Interview and communicate
Meet face-to-face (onsite is best) and ask probing questions:
-
What is your process from demolition to final walk‑through?
-
What subcontractors will you use (plumbers, electricians, tile installers)?
-
Who will be on site daily?
-
How will you handle unforeseen issues (e.g., hidden water damage)?
-
How is the schedule structured (milestones)?
-
How do you manage cleanup, dust, and protection of the surroundings?
A good contractor will communicate clearly, offer suggestions, and listen to your needs rather than just trying to upsell.
Sign a clear contract and monitor progress.
Once you choose, sign a contract that includes scope, timeline, payment schedule (often milestone payments, not upfront full), change order process, permit responsibilities, cleanup, and warranty. Keep a project journal (photos, notes) and check periodically that work matches specs.
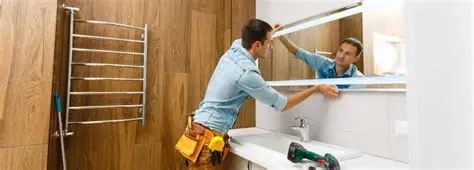
Product and tool examples used by contractors & homeowners
In bathroom remodeling, certain tools and products are essential to ensure quality, efficiency, and durability. Below are 5 real-world product examples that relate to the process of bathroom remodeling and help either the contractor or homeowner:
Dremel Multi-Max MM50 Oscillating Tool

This versatile oscillating multi‑tool is widely used for cutting flush with walls, removing grout, trimming drywall, trimming tile edges, and performing precise adjustments in tight spaces.
Because it accepts a wide variety of attachments (sanding pads, cutting blades, grout blades), it becomes a multipurpose weapon in remodeling.
It solves the problem of having to carry many single‑purpose tools; you just swap blades. It’s particularly helpful when working around curved surfaces or tight corners where a regular saw won’t reach.
Use case: During bathroom demolition, use the Multi-Max to carefully remove drywall near plumbing or to cut plasterboard around existing pipes without damaging them.
How to buy: You can buy it from major tool retailers (e.g., Home Depot, Amazon). Consider purchasing a kit with multiple blades and a carry case.
Makita 18V LXT Sub‑Compact StarlockMax Multi-tool
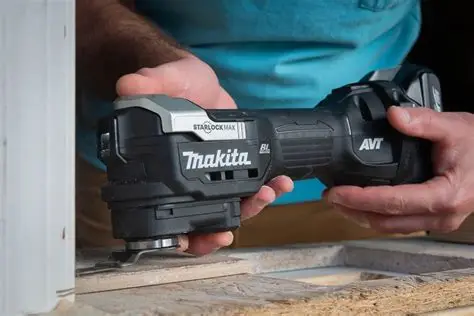
This is a modern cordless multi-tool that offers powerful oscillation (10,000–20,000 opm) in a compact form, perfect for bathroom spaces.
It solves the challenge of maneuvering in tight bathroom spaces and cutting precision parts or trimming tile edges.
Use case: After tiles are set, use this tool to flush‑trim a protruding tile edge or cut out leftover adhesive that interferes with trim pieces.
Where to buy: Available from tool specialty stores or online marketplaces (e.g., Amazon, Home Depot).
Makita 18V LXT Caulk & Adhesive Gun
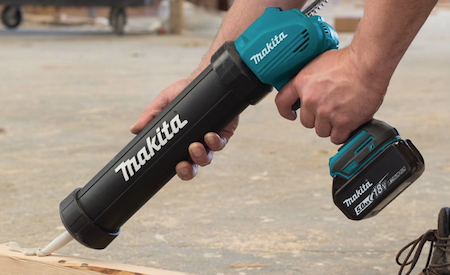
When installing bathtubs, tubs, showers, or sealing joints, a powered caulk gun eases the application of silicone or adhesive sealants. The tool pushes the cartridge and gives more control, especially over long runs.
It solves the problem of hand fatigue and uneven bead application in long sealant runs.
Use case: After installing a bathtub or surround, use the caulk gun to apply consistent silicone sealant along the tub‑wall junction to prevent leaks.
Where to buy: At hardware or tool suppliers; choose models that support standard 10 oz / 300 ml cartridges.
Makita 18V LXT Random Orbit Sander (5‑inch)
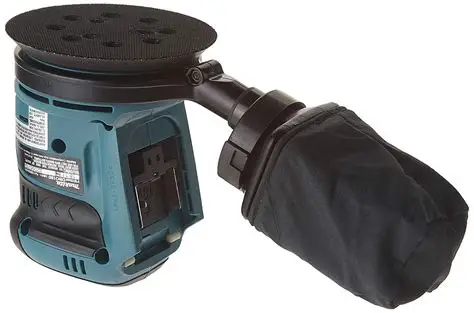
To achieve smooth surfaces before painting or finishing, this sander is useful for sanding patched drywall surfaces and smoothing trim edges.
It solves the problem of uneven surfaces or ridges that show through paint.
Use case: After puttying or skim coating walls, use this sander to flatten the surface before applying primer and paint.
Where to buy: Tool stores, online; ensure you get dust collection port compatibility for a cleaner job.
Makita 18V LXT 2‑Gallon Wet/Dry Vacuum with HEPA filter
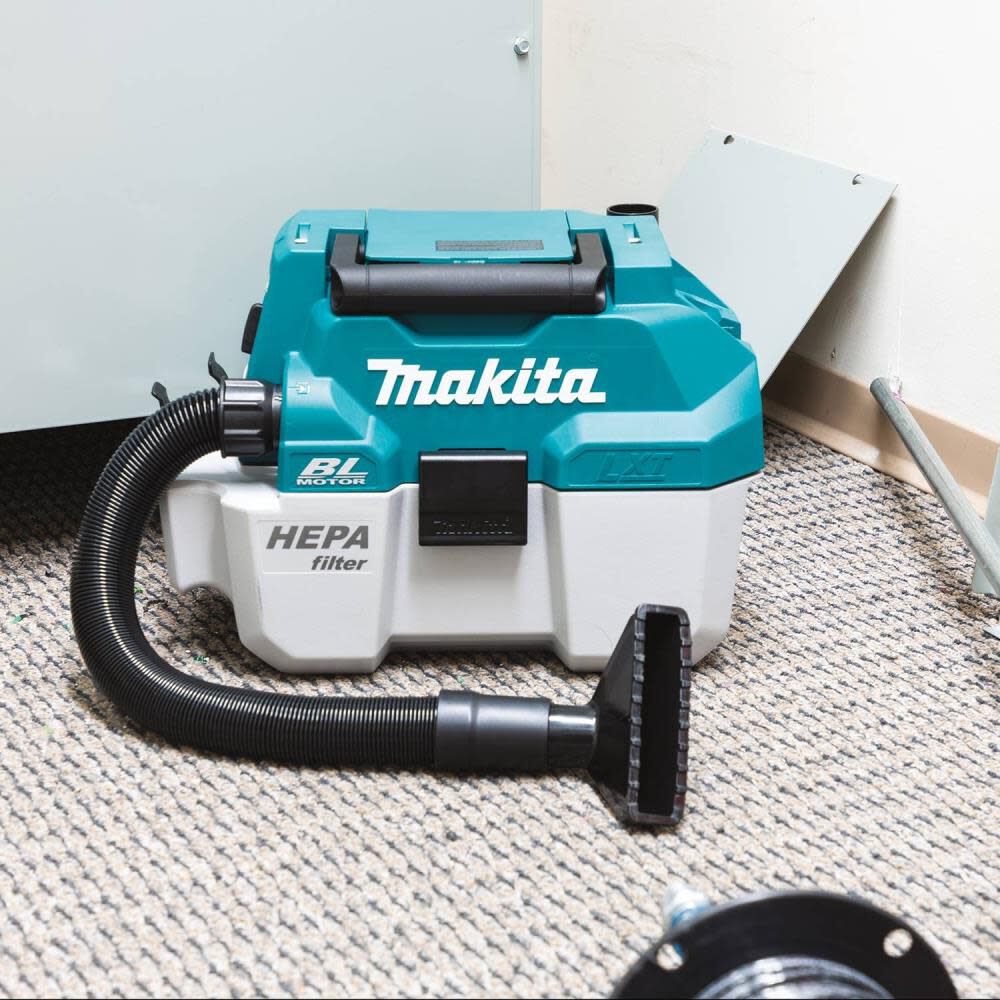
Makita 18V LXT 2 Gallon HEPA Portable Wet/Dry Dust Extractor/Vacuum Kit
On a bathroom remodel, dust and debris are inevitable. This vacuum can collect dust, dry debris, and small water spills, and has a blower function.
It solves the problem of keeping the workspace clean, reducing dust migration to the rest of the home, and improving air quality.
Use case: After demolition or tile cutting, run the vacuum to pick up particles, or during sanding to reduce airborne dust.
Where to buy: Hardware/tool suppliers; choose ones with HEPA filtration and adequate capacity.
How these products benefit your remodeling project
-
Precision and flexibility: Multi‑tools (oscillating, starlock) enable detailed cuts, trimming, and work in confined spaces, minimizing damage to adjoining surfaces.
-
Speed and efficiency: Power tools accelerate many tasks (cutting, sanding, sealant application); tasks that would take hours by hand become minutes.
-
Better finish quality: Using the right tools helps produce plumb, level, smooth surfaces, which reduces callbacks and visible flaws.
-
Cleaner job site and safety: Vacuums and dust‑collecting tools reduce dust, protect your lungs, protect existing finishes, and give a more professional impression.
-
Reduced labor fatigue and better consistency: Powered caulk guns, sanders, and efficient tools reduce hand fatigue, leading to more consistent work throughout the day.
When you hire a contractor who invests in such tools, it often correlates with better workmanship, efficiency, and accountability.
Use cases & problems these tools solve in a contractor selection context
Unexpected plumbing chase left open
Imagine you and your chosen contractor uncover a plumbing chase behind the wall that needs additional framing and waterproofing. A skilled contractor will use a multi-tool to precisely cut out drywall, refit studs, install backerboard, and then use a caulk gun or adhesive to seal transitions. Because they have the right tools and experience, they can handle this change order smoothly rather than scrambling or causing delays.
Finish deficiencies in drywall or trim
Often, after installations, drywall seams, patches, or trim surfaces need refining. A contractor with the right sander and finish tools ensures these surfaces are smooth, paint-ready, and free of visual defects. Without such tools, these imperfections lead to visible lines or poor paint adhesion.
Dust migration and homeowner disruption
A conscientious contractor will use a wet/dry vacuum or HEPA filter to minimize dust spread into the rest of the home. This is especially important in occupied homes. If they don’t manage dust well, your furniture, living space, and air quality suffer — a common homeowner complaint. A contractor with professional cleanup tools signals attention to detail and respect for your home.
In comparing contractors, ask whether they own or plan to use these professional tools. Their willingness to invest in proper equipment is a signal of quality.
How to hire, where to find, and steps to proceed
Where to find contractors/services
-
Local home improvement directories (Angi, Houzz, HomeAdvisor, Thumbtack)
-
Referrals from friends, neighbors, or local real estate agents
-
Local contractor associations or building boards (they often have vetted lists)
-
Social media / local community groups (Facebook, Nextdoor)
-
Google Maps / local search, check reviews, and see images of their past work.
How to vet and select
-
Initial filtering: Use your project scope to eliminate contractors who don’t specialize in bathrooms or whose minimum job cost is much higher than your budget.
-
On-site visits/interviews: Invite shortlisted contractors to your site, present your project, listen to their suggestions, and assess professionalism.
-
Check licensing, insurance, and references: Request documentation and contact references.
-
Detailed proposals/bids: Ask for line‑item bids, realistic timelines, change order policies, and clauses for surprises.
-
Contract & deposit: Negotiate a fair deposit (commonly 10–20 %) after permitting and start of site prep, then subsequent payments tied to milestones.
-
Communication & reporting: Ask for daily or weekly progress updates, photo logs, and site cleanliness assurances.
Common pitfalls & tips
-
Don’t choose solely on the lowest bid – quality, warranty, materials, and reputation matter.
-
Always insist on waterproofing and moisture protection – bathrooms are high risk for leaks.
-
Ask about how they handle unforeseen issues or hidden damage (e.g., rot, mold) and how change orders are priced.
-
Ensure permit responsibilities are spelled out in the contract.
-
Retain final payment until after final inspection and punch list items are completed satisfactorily.
-
Document everything (photos, change orders, receipts).
Frequently Asked Questions
Q: How much does it cost to hire a bathroom remodeling contractor?
A: Costs vary greatly by region, scope, finishes, and complexity. A basic bathroom refresh might cost a few thousand dollars, whereas a full gut remodel with high-end finishes can run tens of thousands. Always get multiple quotes, see what’s included (fixtures, demolition, plumbing, tile, finishes), and budget a 10–20 % contingency.
Q: How do I know a contractor is reliable and won’t leave me mid‑project?
A: Check referrals, online reviews, and past projects. Use a contract with milestone payments (not full upfront). Include contract terms covering delays, abandonment, and walk‑away remedies. Also, verify they have insurance and licensing, which increases accountability.
Q: Can I manage part of the project myself and hire a contractor just for specific tasks?
A: Yes — many homeowners handle materials procurement, demolition, or painting, while hiring skilled trades (plumbing, waterproofing, tiling). But you’ll need to coordinate schedules, ensure compatibility of work, and maintain quality control. When using a contractor for specific tasks, clearly delineate scope, interfaces, and responsibilities in writing.


Leave a Reply