

Learning how to grow oyster mushrooms for beginners is easier than you might think. Oyster mushrooms are a popular edible fungus with high market value and strong consumer demand. Their cultivation process is relatively simple and doesn’t require much space, making them ideal for small-scale or home-based growers. However, success depends on using the right techniques and managing the growing environment carefully.
1. Preparing the Growing Medium
The first step in cultivating oyster mushrooms is preparing a nutritious growing medium that supports optimal growth.
Materials Needed:
- Hardwood sawdust (e.g., mahogany)
- Fine bran
- Corn flour
- Dolomite lime
- Clean water
How to Make the Growing Medium:
- Mix:
- 100 kg of sawdust
- 10 kg of bran
- 10 kg of corn flour
- 0.5 kg of dolomite lime
- Enough water (around 60%)
- Stir until the mixture can be clumped without breaking.
- Let the mixture ferment for 1–2 days.
- Fill heat-resistant plastic bags with the fermented mixture, compress it, insert a PVC ring, and plug with cotton.
2. Sterilizing the Baglogs
The filled bags (called baglogs) must be sterilized using a steam drum for about 10 hours. This process eliminates bacteria and wild fungi that can interfere with growth.
3. Inoculating Mushroom Spawn
After the baglogs have cooled:
- Use high-quality oyster mushroom spawn from a trusted supplier.
- Sterilize your hands and tools.
- Insert the spawn into the hole of the baglog and seal it again.
4. Incubation and Care
- Store the inoculated baglogs in an incubation room for 2–4 weeks.
- Ideal temperature: 22–28°C
- Humidity: 60–70%
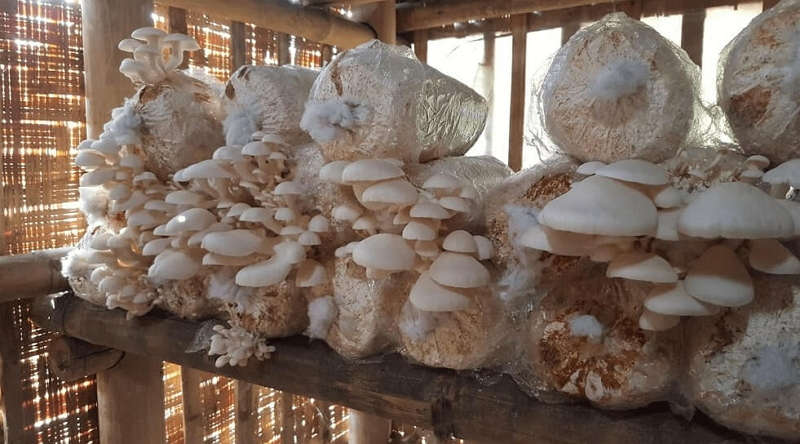
- Once the mycelium (mushroom root network) fully colonizes the medium, remove the cotton plug and move the baglogs to the fruiting room (kumbung).
5. Tips for Caring for the Fruiting Room
- Maintain temperature between 22–28°C.
- Mist the room 2–3 times a day to keep humidity levels high.
- Avoid direct sunlight as oyster mushrooms prefer shady, humid environments.
6. Pest and Disease Control
Common issues include:
- Caterpillars: Appear in overly humid environments. → Improve air circulation and hygiene.
- Ants & spiders: Can be removed manually or with natural sprays.
- Contaminating fungi (e.g., Aspergillus): Prevent with clean tools and proper sanitation.
7. Harvesting and Post-Harvest Handling
Harvest Time:
- Mushrooms are ready to harvest 2–3 weeks after fruit bodies appear.
- Ideal time: when the mushroom edges haven’t fully opened.
Harvest Method:
- Gently pluck the mushrooms by hand to avoid damaging the baglogs.
- Do not use sharp tools.
- Ensure your hands are clean to avoid contamination.
Post-Harvest Handling:
- Rinse mushrooms with clean water.
- Remove the hard base as it is not edible.
- Pack in an airtight plastic to keep fresh.
- For long-distance shipping, use refrigerated vehicles.
8. Benefits of Growing Oyster Mushrooms
- Requires relatively low capital
- Suitable for home-scale businesses
- Fast and repeatable harvest cycles
- High and stable market demand
- Can be processed into products like crispy mushrooms or mushroom meatballs
9. Market and Business Potential
Oyster mushrooms have consistent demand in local markets, restaurants, and food industries. With proper packaging:
- They last 3–4 days at room temperature.
- It can last longer when refrigerated.
FAQ (Frequently Asked Questions)
Q: How long until oyster mushrooms can be harvested?
A: Around 2–3 weeks after fruit bodies form. One baglog can produce mushrooms for 3–4 months.
Q: Is oyster mushroom farming suitable for beginners?
A: Absolutely. It’s beginner-friendly, requires minimal capital, and can be done from home.


Leave a Reply